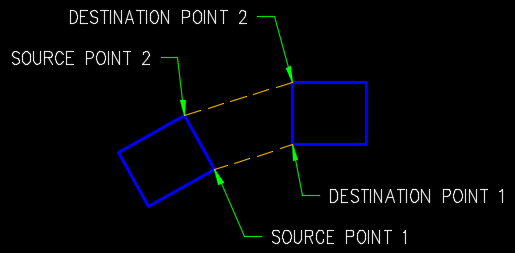
In the simple example below, the blue square on the right is being held in place and we want to align the other blue square to it. Note the location of the source and destination points.
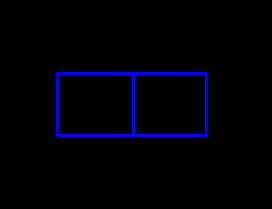
The result is shown below.
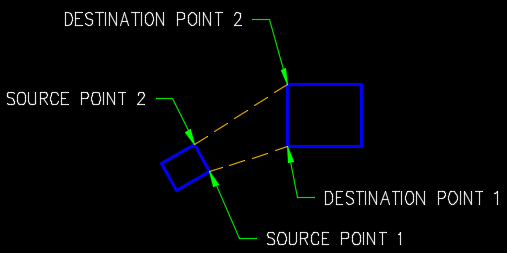
In this next scenario, the source object is smaller than the target. We are going to instruct it to NOT scale the source object.
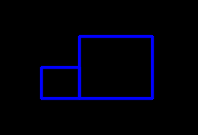
You can probably guess the result here. The smaller square is aligned to the larger one, but its size is not changed.
Below is the same thing, except we are going to tell ALIGN to scale the source object.
Here is the result. The two source points were scaled up to match the two destination points.
Of course these are simple examples with only one object being modified. Your selection can be any number of objects. How do you use the ALIGN command? Questions? Leave a comment.


There’s certainly a lot to learn about this topic.
I really like all of the points you’ve made.
Very useful info specially the closing part 🙂