Revit is known for its robust Element Visibility Override hierarchy. In the MEP realm, there is one extra to consider and that is Graphic Overrides for Systems such as Ductwork and Piping. Whether you’re an architect who is simply looking to show the systems in a composite view from a link, or an MEP designer stuck in a collaborative team environment where System Graphic Overrides is a company standard, they can quickly seem to be pesky in changing the colors. Most will soon realize that simply changing the color of the Duct or Pipe categories in Visibility/Graphics has no effect. The only viable way to change the color is to literally alter the Graphic Override of the System, since this visibility control is considered a Top Level Override. There is hope, and in most cases you will want to save this method in your Template as a Filter or set of Filters.
As you can see below, this is an example of System Graphic Overrides.

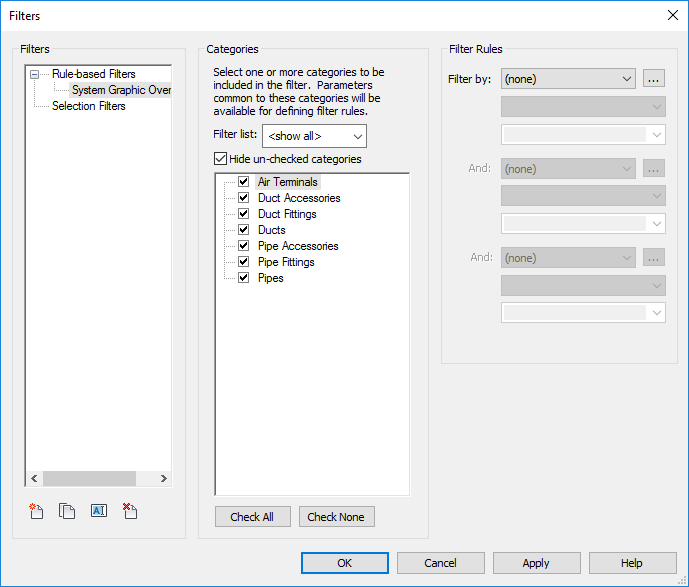
To regain control of this Top Level Override, go to Filters and add a new Filter. I will name this System Graphic Overrides to keep it simple. Select all items affected by System Graphic Overrides. Leave Filter Rules blank.
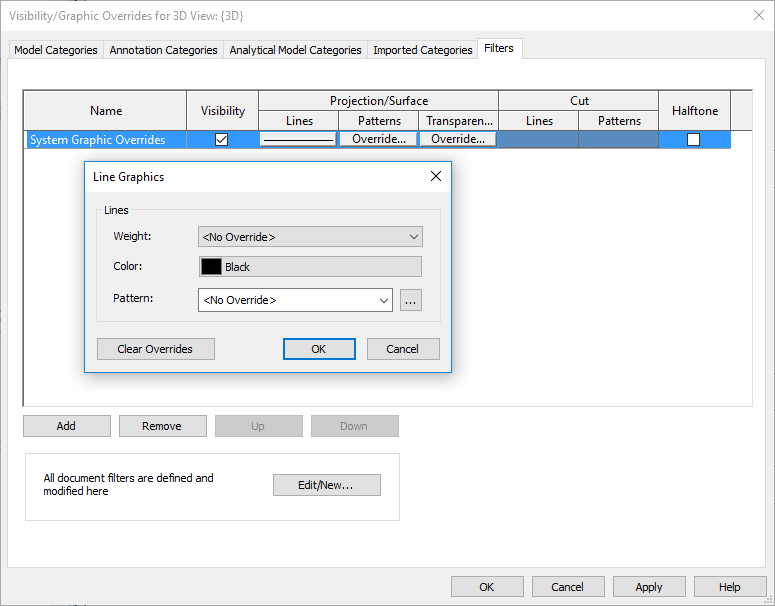
Apply the Filter to the View. Only change Color and set it to Black. (For best use of Halftone, set the color to Black and enable the Halftone checkbox)
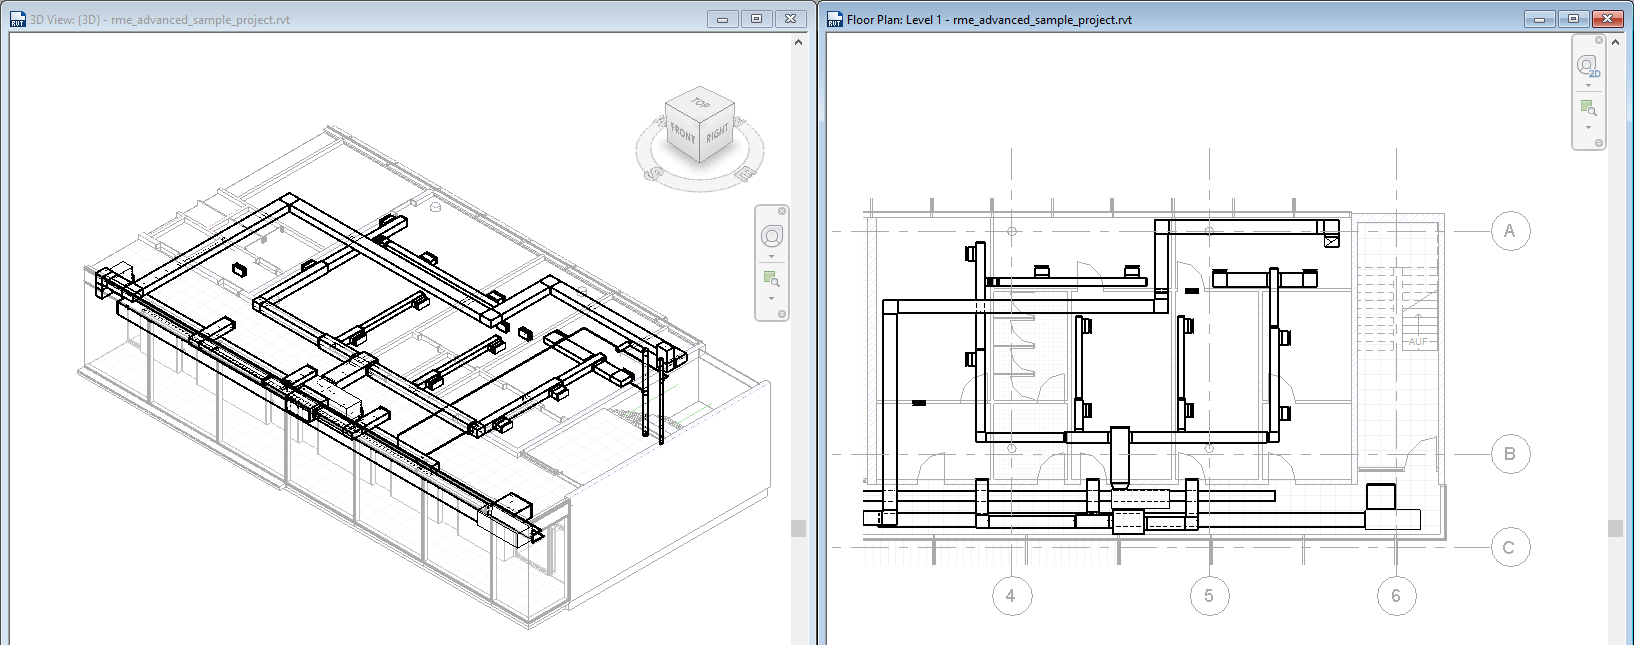
The end result is shown. What you cannot achieve with Visibility/Graphics can be accomplished with Filters instead.
In this tip, I used one Filter to apply to all systems. Your mileage may vary, so breaking out the Filters that best works for you such as only Piping categories, or only Duct categories, and so forth may be better depending on your situation.