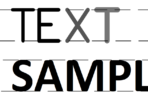
Let’s move on and cover a few more things. When you are creating or defining a block, you can include information that can later be extracted into a table or spreadsheet. You do this by including attributes in your block definition. For example, if you are defining a block that represents a machine part, you could include attributes for the type of part, the manufacturer, the model number, and the cost. Later after you have added many of these blocks to a drawing, you can use the DATAEXTRACTION command to gather, organize, and sum the data stored in these attributes.
Attributes can be visible or hidden and they can be constant or variable. If ATTREQ = 1, the user will be prompted at block insertion time for the variable attributes. You create attributes with the ATTDEF command, where each one in a given block typically has a different tag name. At the same time you can assign visible attributes many of the same properties as TEXT objects such as textstyle, height, and justification. You can also edit these properties later with the BATTMAN command. For a detailed tutorial on creating a block definition with attributes, see this page from Ellen Finkelstein’s AutoCAD Tips Blog.
Once you have your blocks defined, how can you use them in other drawings? There are generally two thoughts on this. As mentioned in part 1, you can create a DWG file and insert that, and the DWG file is your “block”. Another way of doing this is to create multiple block defintions in a single DWG file, then you can use DesignCenter to insert those blocks one-by-one into any other drawing. DesignCenter is sort of like Windows Explorer, in that it lets you browse folders, but the really nice part is that you can drill down inside DWG files to find blocks, layers, dimstyles, etc. and insert those objects into your current drawing. Once you find what you need, simply drag and drop the object into your currently open drawing.
Okay, you have defined your block and inserted dozens of them into your drawing, what happens when you need to make a change to the block definition? Back in the old days, this meant exploding one of the inserted blocks, making the necessary changes, then recreating the block with the same name. Today, you can simply run the BEDIT command, select the block and this will take you into a special editing environment where you can make changes, add dynamic parameters and actions, and even test the block before returning to your drawing file. Remember that making a change to the block geometry will update every instance of the block in the drawing. The one exception to this rule is that attributes that are changed, removed, added, etc., are not updated on existing block insertions. At least not until you sync those changes with one of two other commands as described in this nice tutorial on syncing attributes.
We hope this little two part series has helped you gain some insight on the use of Blocks in AutoCAD.


