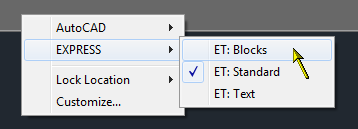
- If you have ANY docked toolbar visible, right click in an empty toolbar area (but not on a visible toolbar), and from there you can choose a toolbar from the menu that appears. Each loaded menugroup will be listed.
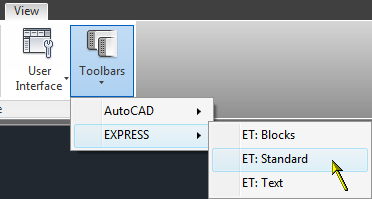
- If you do not have any docked toolbars but your Ribbon is enabled, go to the View tab on the Ribbon and find the User Interface panel, then the Toolbars dropdown. Choose the toolbar you want here.
- Lastly, you can use the command line method, using the -TOOLBAR command (note the leading hyphen). When you use -TOOLBAR, you must know the exact toolbar name you want to make visible, but this command has many options. You can dock the toolbar or make it floating. If you make it floating, you can specify the exact location using screen coordinates. If you accept the defaults location (0,0) the toolbar will appear in the upper left corner of your primary monitor. If you want to specify a different location, be aware that the values increase as you move left and down. So if you specify a location of 300,500, the toolbar will be placed 300 pixels to the left and 500 pixels below the upper left corner of your primary monitor.

Of course the power of the -TOOLBAR command is that you can script this using a menu macro or lisp routine to place multiple toolbars exactly where you want to. If you watch the prompts on the -TOOLBAR command, you’ll see that you can hide toolbars also, so it’s possible to setup some shortcuts to show and hide various toolbars – which should be quicker than switching workspaces.