I only recommend modifying Revit line weights under the approval of your BIM/CAD manager and general consensus of those whose opinions matter within your firm. The resounding theme I have heard over the years is “we need consistency”. Yes, even within the same firm. Futzing (yes, I’m from PA Dutch country) with line weights on an individual basis may lead to debilitating consequences in your chosen career path. You’ve been warned.
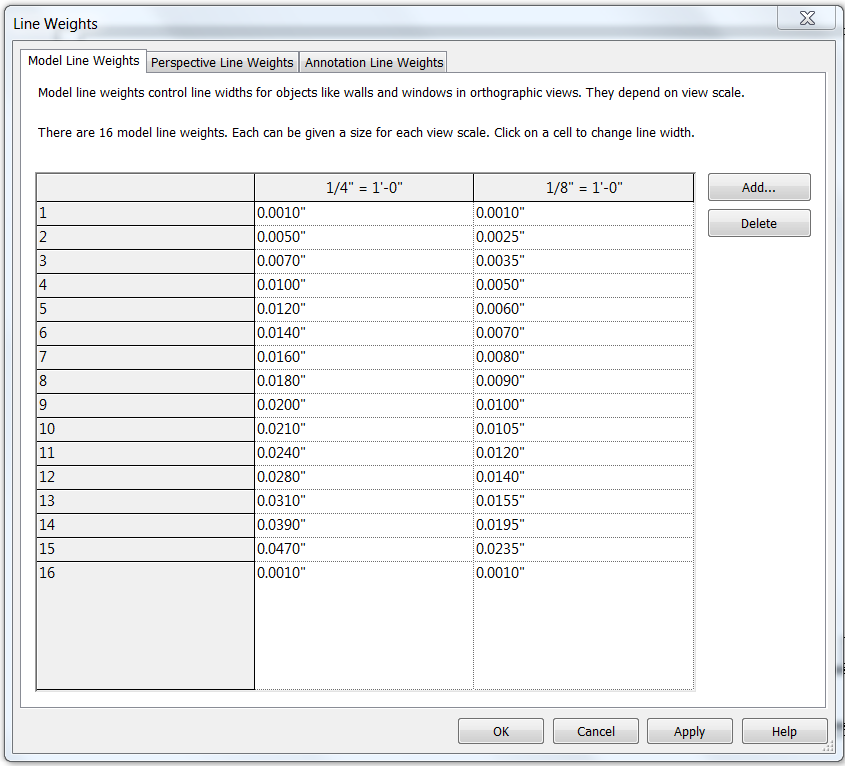
First, we’ll take a look at Line Weights (Manage tab, Additional Settings). I truly have to give David Harrington credit for our line weight setup. He wrote an AUGI article which brought a revelation in line weight efficiency. The OOTB Revit lineweights are overwhelming and difficult to manage (but, as I said before, functional). Step one would be to simplify the Revit line weights. The line weights below follow the original 15 standard line weights (anyone over the age of 35 will flash back to drafting school and hours bent over the drafting table perfecting said line weights…) as well as an additional default. With this system applied to Revit line weights, any scales smaller than 1/8″=1′-0″ will default to the 1/8″ line weights. Any scales larger than 1/4″=1′-0″ will default to the 1/4″ line weights. It really can be that simple.
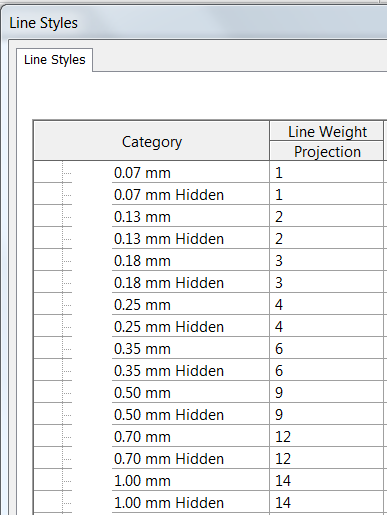
Once the line weights are set, the next step is to set the Line Styles (Manage tab). Following the theme of David’s “old school” line weights, we have created custom line styles that are based off of the line weights we have established, in addition to modifying the standard Revit line styles.
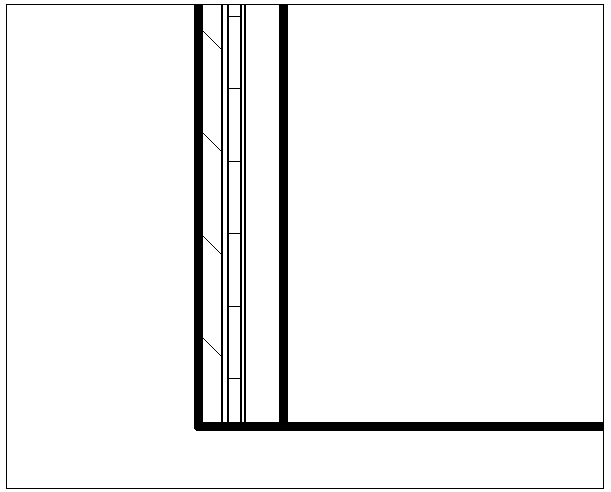
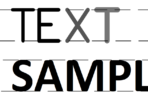
The final step is probably the most time consuming, and that is setting the actual Object Styles. This is where personal preferences collide and consistency often fails. The discussion in our office that prompted this entire expedition centered around Walls, and specifically how walls plot in plan and section. “Old School” calls for heavier lines for the outside boundaries of walls, with thinner lines for the core and finishes. This can easily be achieved by setting the Common Edges to be a thinner line weight in both Projection and Cut.
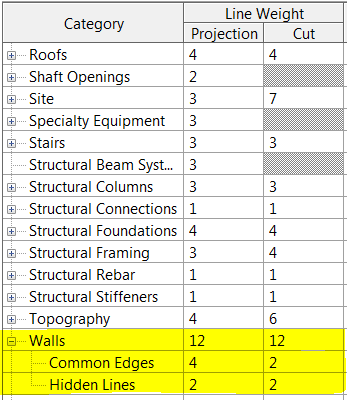
The overall boundary of the wall remains the heavier outline, while the guts of the wall are thinned out.
Again, this is not a process for the faint of heart, and certainly takes some preparation, planning and understanding of how Revit applies line weights to drawings.

Pingback: Weekly Roundup – 2015.29 | The BIMsider
very nice post, i certainly love this website, keep on it
Hi, just wanted to tell you, I enjoyed this post. It was inspiring. Keep on posting!